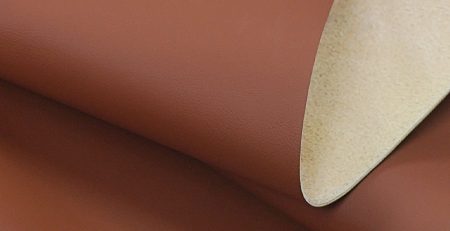
How to Make Stunning DIY Crafts with Glitter Faux Leather

You can transform ordinary crafting sessions into dazzling experiences with glitter faux leather. The smooth, flexible sheets and chunky glitter surfaces let you experiment with unique textures and shine. Many crafters use canvas-backed or vinyl-backed options when making earrings, bows, or structured projects. The popularity of glitter faux leather continues to rise, especially for footwear uppers and handbags.
If you want to learn how to make standout diy crafts, start exploring with the right tools and tips. You will discover how glitter can elevate your earrings and holiday creations.
How to Make Stunning DIY Crafts with Glitter Faux Leather
- Glitter faux leather is versatile. Use it for earrings, bows, keychains, and home décor. Experiment with layering colors for unique designs.
- Choose high-quality materials. Non-woven backings work best for cutting. Test a small piece before starting your main project to ensure good results.
- Use the right tools for clean cuts. A Cricut machine offers precision for intricate designs. Always check blade sharpness and machine settings.
- Seal edges to prevent shedding. Use leather paint or clear adhesive and re-iron with a protective sheet for a polished finish.
- Explore creative projects. Make faux leather earrings or festive decorations. Mix different glitter sheets for added depth and sparkle.
Why Choose Glitter Faux Leather for Crafts
Versatility and Popular Projects
You can use glitter faux leather to create a wide range of crafts. This material works well for earrings, bows, keychains, and even home décor. The flexible sheets let you cut out shapes for both simple and complex designs. You can layer different colors of glitter to make bold patterns or add sparkle to everyday items. Many crafters enjoy making holiday ornaments, bookmarks, and custom patches. If you want to try something new, you can combine glitter with other materials like felt or fabric for unique effects.
Tip: Try mixing fine and chunky glitter sheets in one project. This adds depth and makes your crafts stand out.
You do not need advanced skills to start crafting with glitter faux leather. The material cuts easily with scissors or a cutting machine. You can use glue, snaps, or even sew it for different projects. This makes it a favorite for both beginners and experienced crafters.
Benefits Over Real Leather
Glitter faux leather offers several advantages compared to real leather. You get the look and feel of leather without the ethical concerns. Many people choose faux leather because it supports animal welfare and cruelty-free crafting. You also help the environment when you use this material.
- Animal welfare: Faux leather does not require animal slaughter.
- Lower immediate environmental impact: Production uses less land, water, and energy. It also produces much lower CO2 emissions than real leather.
- No livestock involvement: Vegan leather avoids agricultural land use, deforestation, and animal deaths.
You can enjoy crafting with glitter faux leather knowing you make a more sustainable choice. The wide variety of colors and finishes lets you match any style or occasion. You also avoid the maintenance and cost issues that come with real leather. This makes glitter faux leather a smart option for anyone who loves to add sparkle to their crafts.
Essential Tools and Materials for Glitter Faux Leather
Choosing the Right Glitter Faux Leather
You want your projects to shine, so selecting high-quality glitter faux leather matters. Look at the backing type first. Non-woven, knit, and woven backings each affect how the material cuts and feels. Non-woven backed sheets work best with cricut faux leather projects because they cut smoothly and resist fraying. Knit and woven backings can add texture but may challenge your cutting machine. Material composition also plays a role. Non-woven options often use cellulose or synthetic fibers, which help you achieve crisp edges and clean shapes.
Tip: Test a small piece before starting your main project. This helps you check cutting ease and glitter adhesion.
Tools: Cricut, Blades, and More
You need the right tools to get professional results with glitter. Cricut faux leather projects require a Cricut Maker or Explore machine. Use a knife blade for chunky glitter sheets and adjust the pressure settings for best results. Familiarize yourself with your machine’s settings to avoid mistakes. Manual tools also help. Experienced crafters recommend a utility knife for easy cuts and a precision knife for detailed designs. A rotary cutter slices straight lines quickly, especially on thick glitter sheets. Protect your workspace with a self-healing mat. Use an awl to punch holes and rough up surfaces for better glue grip. A punch set adds holes for hardware, and a wooden or rubber mallet sets hardware without damaging your glitter faux leather.
Adhesives and Finishing Supplies
Securing glitter faux leather requires strong adhesives. Tulip glue works well for larger areas and stays flexible after drying. Aleene’s OK to Wash applies with a fine tip and remains flexible, making it ideal for wearable crafts. Aleene’s Flexible Stretchable Glue suits clothing that needs to stretch. Always let your glue dry fully before handling your project. For a polished finish, use edge sealants or re-iron edges to keep glitter from shedding.
Note: Choose adhesives based on your project’s needs. Flexibility and washability matter for wearable crafts.
How to Cut and Shape Glitter Faux Leather
Cutting and shaping glitter faux leather can feel intimidating at first, but you can achieve crisp, professional results with the right approach. Whether you use scissors or a cutting machine, understanding the best techniques will help you avoid common mistakes and create stunning crafts.
Cutting by Hand vs. Machine
You can cut glitter sheets by hand or with a machine. Scissors work well for simple shapes and small projects. Choose sharp, non-stick scissors to prevent the glitter from gumming up the blades. For straight lines, a rotary cutter and ruler give you clean edges. If you want to make detailed or repetitive shapes, a cutting machine like a Cricut offers more precision.
When you use a machine, you save time and get consistent results. Machines handle intricate designs that are hard to cut by hand. However, you must set up your materials correctly to avoid tearing or uneven cuts. Always test your settings on a scrap piece before starting your main project.
Tip: If you notice jagged edges or missed spots, check your blade for dullness and replace it if needed.
Cricut Settings for Clean Cuts
Getting clean cuts on glitter faux leather with a Cricut requires careful preparation. Follow these steps to improve your results:
- Select a fine-point blade for thin faux leather. Use a deep-point blade for thicker glitter sheets.
- Place your material face down on a purple strong grip mat. This mat holds the glitter securely and prevents shifting.
- Burnish the material onto the mat using a scraper or brayer. This step ensures a firm bond and reduces the risk of lifting during cutting.
- Perform test cuts before starting your full design. Adjust the pressure settings if the blade does not cut all the way through or if it snags the material.
You can avoid most cutting issues by following these guidelines. If you see incomplete cuts, increase the pressure slightly or repeat the cut. If the glitter starts to peel, check that the mat is clean and sticky enough.
Note: Always remove your finished shapes gently from the mat to prevent stretching or tearing.
Sealing and Re-ironing Edges
After cutting, you may notice some rough or frayed edges. Sealing and re-ironing help you achieve a polished look and keep your crafts durable. Several techniques can prevent fraying and give your projects a professional finish:
- Add a suede backing to your shapes. This method strengthens the edges and adds a soft touch.
- Round the corners of your pieces. Sharp corners tend to fray more easily, so rounding them helps maintain the shape.
- Apply leather paint to the edges. Use a paint applicator for even coverage and fine grit sandpaper to smooth any rough spots before painting.
- Re-iron the edges with a protective sheet. A quick press with a warm iron can help reseal the glitter and flatten any lifted areas.
These steps not only improve the appearance but also extend the life of your glitter crafts. If you notice glitter shedding after sealing, let the paint or adhesive dry completely before handling.
Tip: Always work in a well-ventilated area when using paints or adhesives to seal your faux leather edges.
If you run into trouble, check that your materials are compatible with your chosen sealing method. Some adhesives or paints work better with certain types of glitter faux leather. Testing on a small area first can save you time and frustration.
DIY Project Ideas: Faux Leather Earrings & Christmas Tree Craft
You can create eye-catching accessories and festive decorations with glitter faux leather. This section guides you through making faux leather earrings and a diy christmas tree craft. You will also learn how to use HTV for double-sided projects. These ideas help you add sparkle to your everyday style and holiday celebrations.
Step-by-Step Faux Leather Earrings
You can make faux leather earrings that stand out at any event. Follow these steps to create glitter earrings with layered designs:
- Gather your materials. You need chunky glitter faux leather, strong grip transfer tape, and a purple mat.
- Cut the glitter vinyl to 3 inches wide by 3 inches tall. Prepare a piece of transfer tape that measures 4 by 4 inches.
- Place the transfer tape sticky side up on your mat. Put the glitter sheet glitter side down on the tape.
- Load your mat into the Cricut machine. Start cutting your earring shapes.
- Remove the cut shapes from the mat carefully. Avoid stretching the faux leather earrings.
- Cut the next layer using fine glitter faux leather. Adjust your material settings for better cuts.
- Cut the middle layer from buffalo plaid. Use a custom material setting for crisp edges.
- Assemble the earrings using jump rings and earring hooks. Make sure you orient the earrings for proper hanging.
- You can use Ball Ear Wires for a tool-free assembly if you prefer.
Tip: Reduce the heat and time when pressing HTV on faux leather earrings. Test press with a small piece of HTV and a scrap of faux leather to check compatibility.
You can mix chunky and fine glitter sheets for depth. Try different shapes and colors to match your outfits. Faux leather earrings make great gifts and add a personal touch to your style.
Easy Christmas Tree Craft with Glitter Faux Leather
You can brighten your holidays with a diy christmas tree craft. Glitter faux leather works well for ornaments, garlands, and table decorations. Gather your tools and materials before you start. The table below lists what you need for a successful christmas tree craft:
| Material/Tool | Description/Link |
|---|---|
| Cricut machine | Options include Cricut Maker 3, Maker, Explore 3, Explore Air 2, or Cricut Joy. |
| Purple “Strong Grip” cutting mat | Essential for cutting materials accurately. |
| Blue Painter’s Tape | Used to secure materials during cutting. |
| Cricut “Strong Grip” Transfer Tape | Protects the mat when cutting chunky glitter faux leather. |
| Cricut Weeding Tool | Useful for removing excess material after cutting. |
| 1/16″ Hole Punch | For creating holes in the faux leather. |
| Jewelry Pliers | Needle Nose and Wide Flat Nose for assembling earrings. |
| Earring hooks | Available in Silver and Gold finishes. |
| 6mm Jump Rings | Available in Silver and Gold finishes for attaching components. |
You can cut out tree shapes from glitter faux leather using your Cricut machine. Use the hole punch to add holes for hanging. Attach jump rings and earring hooks to turn your christmas tree craft into festive earrings. You can also glue the trees onto cards or string them together for a garland. Try mixing green, gold, and red glitter sheets for a classic holiday look. Faux leather earrings shaped like christmas trees make fun stocking stuffers.
Note: Use painter’s tape to keep your glitter faux leather in place while cutting. This helps you get clean edges and prevents shifting.
You can create a set of ornaments or earrings for every member of your family. The christmas tree craft brings sparkle to your home and makes your holiday decor unique.
Double-Sided Projects with HTV
You can make double-sided faux leather earrings and ornaments using HTV. This technique lets you add designs to both sides of your glitter faux leather. You can use sublimation or HTV to personalize your crafts.
- Cut your shapes from glitter faux leather. Make sure both sides are clean and free of dust.
- Place HTV on one side and press gently. Reduce the heat and time to avoid melting the faux leather.
- Flip the piece and repeat the process for the other side.
- Test a small piece before pressing your main project. This helps you check compatibility and prevents damage.
- Use festive patterns for holiday crafts or bold prints for everyday earrings.
You can create earrings with a different design on each side. Try snowflakes on one side and plaid on the other for a christmas tree craft. Double-sided faux leather earrings look polished and professional. You can also use this method for keychains and bag charms.
Tip: Store your glitter earrings flat to keep them in shape. Avoid bending the faux leather earrings to prevent creases.
You can use these techniques for holiday and everyday projects. Faux leather earrings and christmas tree craft ideas help you express your creativity. You can make gifts, decorations, and accessories that sparkle all year.
Tips and Troubleshooting for Stunning Results
Common Mistakes to Avoid
When you start working with glitter, you might run into a few common mistakes. Knowing what to watch for helps you get better results with your diy projects. Here are some pitfalls and how to avoid them:
- Use a heavy-duty needle, such as a denim or leather needle, to handle thick glitter sheets.
- Choose polyester thread for sewing. It gives your crafts strength and durability.
- Attach a Teflon or walking foot to your sewing machine. This prevents the material from sticking as you sew.
- Adjust your stitch length to 3.0–4.0 mm. Short stitches can perforate the material and weaken your project.
Tip: Always test your settings on a scrap piece before starting your main design.
Troubleshooting Adhesion and Cutting
You may notice that glitter sometimes peels or does not stick well. If this happens, check your adhesive and make sure you let it dry fully. For cutting issues, a dull blade or incorrect pressure setting can cause jagged edges or incomplete cuts. Replace your blade if you see fraying or missed spots. Use a strong grip mat and secure your material with painter’s tape to prevent shifting.
If you sew glitter, keep your machine clean. Glitter particles can build up and affect performance. Wipe down your workspace after each project.
Care and Maintenance
Proper care keeps your glitter crafts looking new. Follow these steps to maintain the appearance and durability of your finished pieces:
- Avoid direct sunlight to prevent fading.
- Clean regularly with a damp cloth. Skip abrasive cleaners.
- Remove stains right away using a soft, damp cloth and mild soap if needed.
- Never use heat, as it can damage the glitter layer.
- Protect your crafts from sharp objects to avoid scratches.
- Store your items in a cool, dry place away from sunlight.
You should dust your crafts often and dry them with a microfiber cloth. After cleaning, use a fabric protectant spray to help repel stains. These habits will help your faux leather creations last longer and keep their sparkle.
You can create stunning diy crafts by following a few key steps.
- Select the right faux leather for your project, considering texture and backing.
- Use quality tools like a utility knife and self-healing mat for clean cuts.
- Test your cutting settings on a small piece first.
- Adjust your machine for different materials.
Start experimenting with earrings, ornaments, or other creative ideas. Share your finished pieces and inspire others to craft with confidence!

FAQ
How do you keep glitter faux leather from shedding?
You can seal the edges with leather paint or a clear adhesive. Re-ironing with a protective sheet helps lock in the glitter. Always let your project dry fully before handling to prevent shedding.
Can you wash crafts made with glitter faux leather?
You should avoid machine washing. Wipe your crafts gently with a damp cloth. Use mild soap for stains. Never soak or scrub the material, as this can damage the glitter layer.
What blade works best for cutting chunky glitter faux leather?
- Knife blade for Cricut Maker
- Deep-point blade for Cricut Explore
- Sharp utility knife for hand cutting
Test on a scrap piece first to check for clean cuts.
Is glitter faux leather safe for earrings and wearable crafts?
You can use glitter faux leather for earrings and accessories. Choose hypoallergenic hardware for sensitive skin. Let adhesives dry completely before wearing. Store earrings flat to keep their shape.
Can you use heat transfer vinyl (HTV) on glitter faux leather?
Yes, you can apply HTV to glitter faux leather. Use low heat and short pressing times. Always test a small piece first to avoid melting or warping the material.